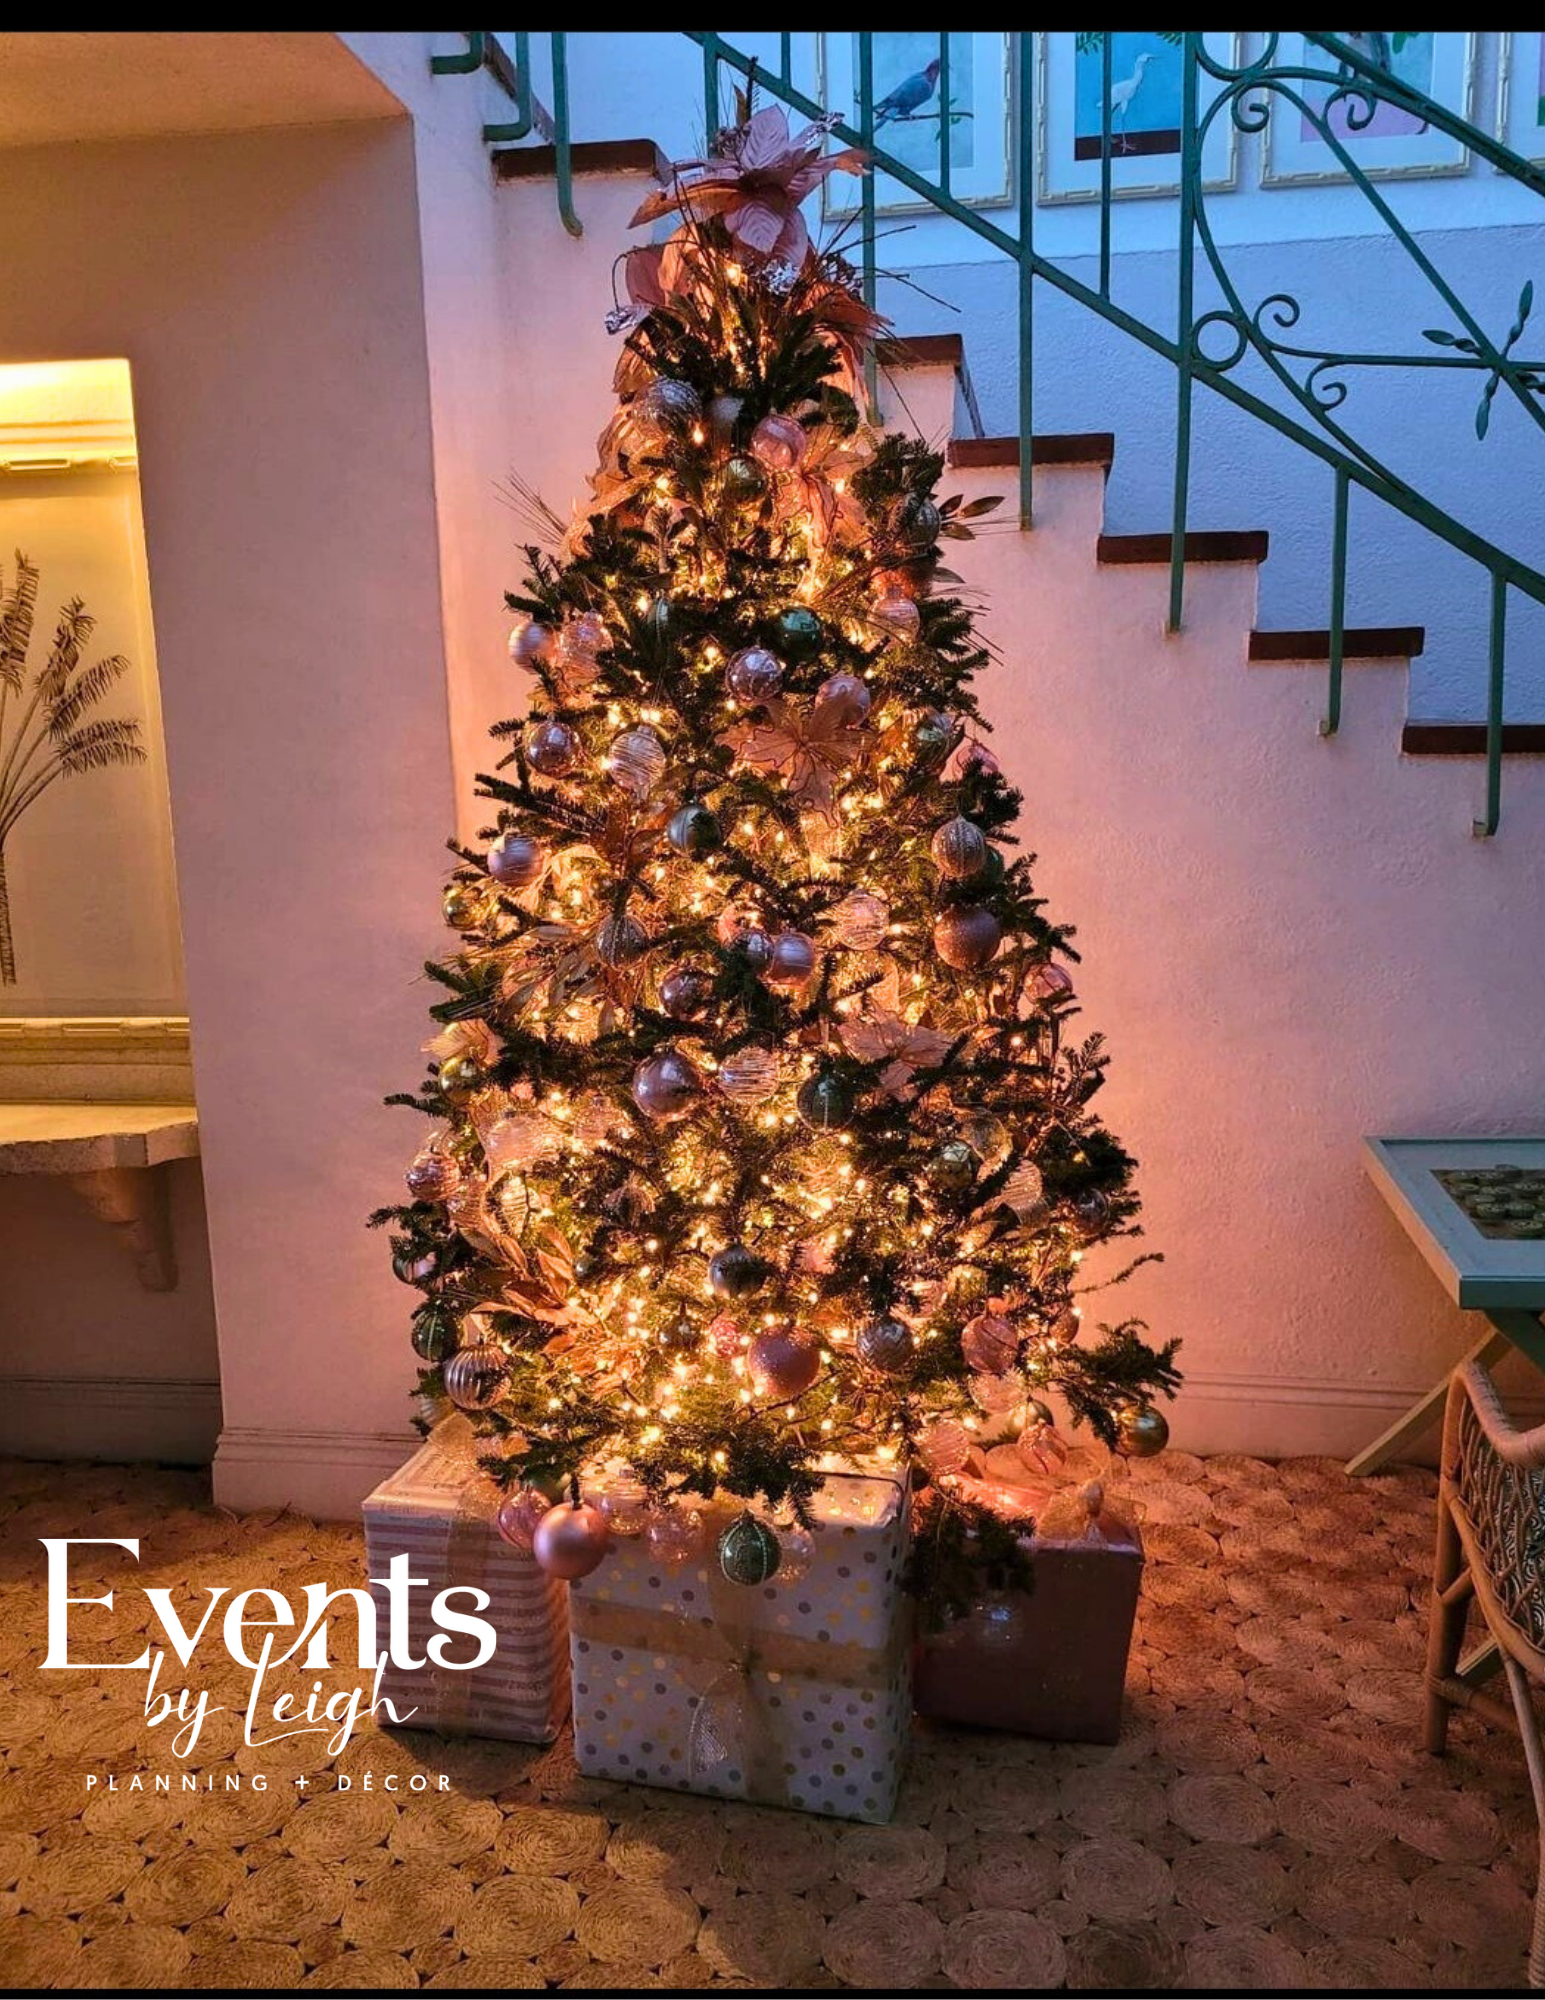
Hey there! 🎄 As someone who spends most of the year creating magical moments for weddings and events, I absolutely live for the holiday season. There's something about transforming a simple tree into a stunning centerpiece that gets my creative juices flowing every single time.
Over the years, I've developed what I like to call my "tree recipes" – specific formulas that guarantee a gorgeous, professional-looking Christmas tree! Whether you're decorating for your own home or helping a client create the perfect holiday backdrop, these tried-and-true quantities and techniques will save you from the guesswork (and the inevitable "does this look right?" panic).
My Secret: It's All About the Recipe 📋
Just like planning the perfect wedding requires specific vendor ratios and timeline formulas, decorating a stunning Christmas tree comes down to having the right proportions. After years of trial and error (and a few pretty sad-looking trees), I've cracked the code.
Here's my go-to recipe for a 6-7' tree:
- 700 lights
- 21 yards mesh ribbon (for artificial trees)
- 21 yards wire-edged ribbon (2.5" – main type)
- 21 yards accent ribbon
- 3 pieces of 6ft garland
- 24 small (3.5") globes, 24 medium (4.7") globes, 24 large(5.9") globes
- 24 flowers, picks, sprays, or bows
- 24 icicles and finials (long, pointy ornaments)
- 24 snowflakes, wings, or figurines/ themed ornaments
Trust me on these numbers – they're based on countless trees and plenty of "we need more lights" runs to the store! 😅
Steps:
- Decide on your theme and colour scheme.
- Do an inventory of what you have on hand to avoid repurchasing duplicates.
- Test your lights.
- Use the recipe to ensure you have enough ornaments to make your tree look full and lush.
To decorate:
- Start by fluffing each branch (Tip: For artificial trees, if there's lots of space, use matching garland to fill between branches).
- Wrap lights around each branch. Use two types of lights if you're feeling fancy: rice lights and regular lights (Tip: Leigh's preference is warm white for a cozier feel).
- Add ribbons in your desired pattern. Use wire to gather ribbons at points and attach to the tree branches.
- Add ornaments, starting with the largest (inner branches) and smaller ones at the tips. Clusters may be added for more texture.
- Finish with the tree topper and skirt—voila!

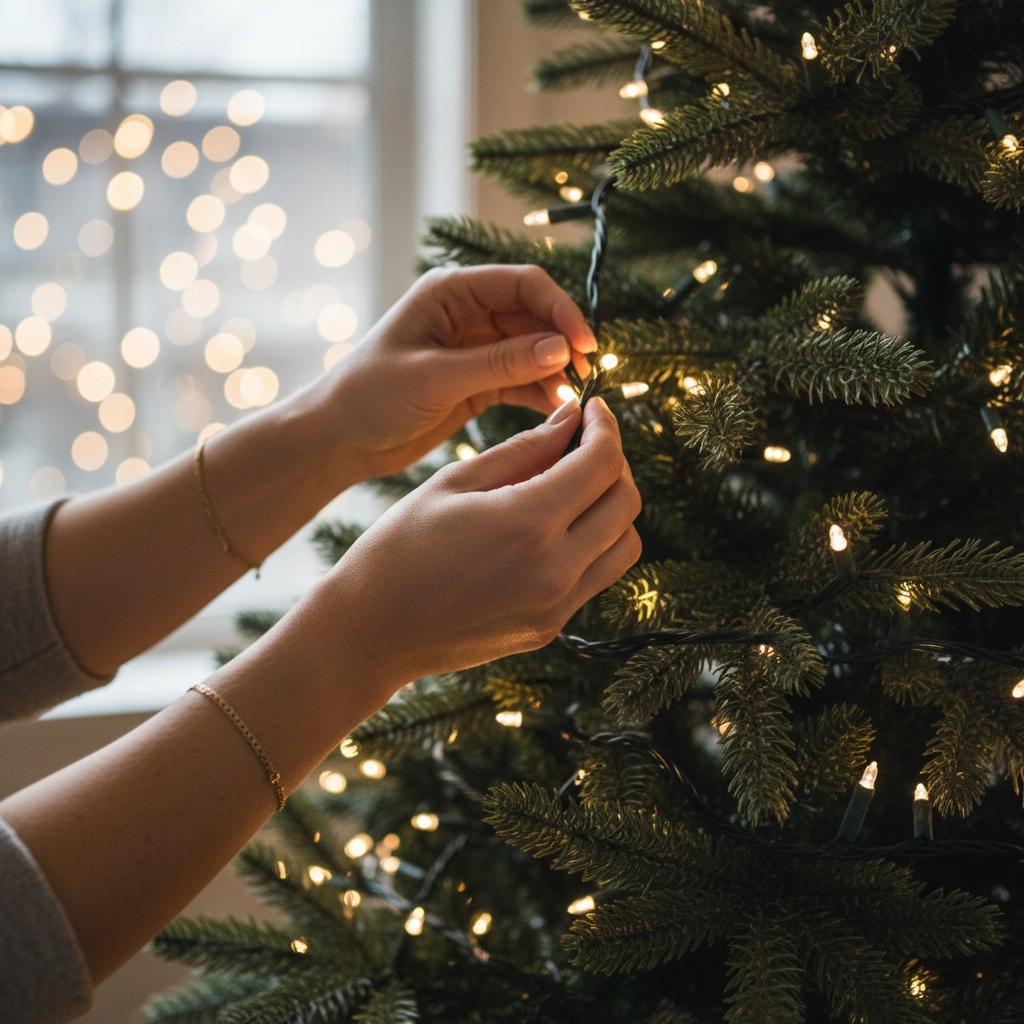
Start with the Foundation: Lights First! ✨
Before you hang a single ornament, get those lights perfect. I always tell my event clients that lighting sets the entire mood, and your Christmas tree is no different.
My lighting secrets:
- Test every strand before you start (learned this one the hard way)
- Start from the top and work your way down
- Wrap lights around each branch, not just draping them over the front
- Keep lights plugged in while decorating so you can see gaps
- For artificial trees, tuck lights deeper into branches for a more natural glow
The key is even distribution. Step back frequently and squint your eyes – this helps you spot any dark patches that need more lights.
Layer Like a Pro: The Ribbon Game 🎀
Here's where my event planning background really shines. Just like layering textures in wedding décor, your tree needs depth and movement. This is where those specific ribbon quantities come in handy.
Mesh ribbon technique:
Start with your mesh ribbon (perfect for artificial trees). This creates your base layer of texture. I like to weave it through branches in a spiral pattern, making sure it flows naturally rather than looking too structured.
Wire-edged ribbon magic:
This is where the real artistry happens. Use your two main ribbon types to create cascading loops and tails throughout the tree. The wire edges let you shape each piece perfectly – bend them, twist them, make them dance! Your accent ribbon adds those final pops of color or pattern.
Pro tip: Don't make your ribbons too perfect. A little asymmetry creates that effortless, organic look that screams "professional decorator."
The Ornament Formula That Never Fails 🎄
Those specific ornament quantities aren't just suggestions – they're carefully calculated to create perfect visual balance. Here's how I approach ornament placement:
Size matters:
- Large ornaments: Deep in the tree for depth, lower sections for weight distribution
- Medium ornaments: Fill gaps, create transition zones
- Small ornaments: Add sparkle throughout, perfect for filling awkward spaces
The magic of odd numbers:
Notice how all my quantities are based on multiples that work well with odd-number groupings? When placing ornaments, think in clusters of 3. This creates more interesting visual triangles than even-numbered groupings.
Time-Saving Tricks from the Trenches ⏰
After decorating countless trees for holiday events, I've developed some serious time-savers:
Prep everything first: Lay out all materials by category. Just like setting up for an event, organization is everything.
Work in rounds: Do all lights, then all ribbons, then all large ornaments, etc. It's faster than trying to complete each section individually.
The photographer's trick: Take photos from different angles as you work. Your camera will catch imbalances your eyes might miss.
Emergency fixes: Keep extra ornament hooks, floral wire, and zip ties handy. Heavy pieces need serious anchoring!
Creating That Wow Factor ✨
The difference between a nice tree and a show-stopping tree often comes down to those final details:
Strategic lighting: Add battery-operated fairy lights to garland for extra sparkle
Texture mixing: Combine matte and shiny ornaments in each color family
Height variation: Hang ornaments at different depths for dimension
Fill the gaps: Use those picks, sprays, and small ornaments to eliminate any bare spots
My Personal Touch: The Event Planner's Secret 💫
Want to know what really makes a tree special? It's the same thing that makes weddings memorable – personal touches that tell a story. I always encourage clients to include a few ornaments that mean something special, whether it's handmade pieces, travel souvenirs, or family heirlooms.
These meaningful elements become conversation starters and create the kind of warmth that no store-bought theme can replicate.
Troubleshooting Common Tree Disasters 🆘
Lights went out halfway through? This is why we test first! Keep spare strands handy.
Tree looking lopsided? Step back and check your ribbon distribution. Usually, one side needs more flowing elements.
Running out of ornaments? This is why I stick to my recipes! But if it happens, focus on filling the front-facing areas first.
Ribbon looking flat? Fluff, twist, and shape each piece individually. Wire-edged ribbon should never lay flat.
The Final Step: Stepping Back and Enjoying 🎊
Just like at the end of a wedding day, there's that magical moment when everything comes together. Your tree should feel balanced, full, and absolutely stunning from every angle.
Take photos to remember your masterpiece, then grab some hot chocolate and enjoy the twinkling lights. You've just created something beautiful that will bring joy all season long.
Whether you're decorating your own tree or helping create the perfect holiday backdrop for an event, these formulas and techniques will give you the confidence to tackle any size tree. Trust the process, follow the recipes, and remember – just like planning the perfect celebration, the magic is in the details! 🎄✨
Need help decorating this holiday season? Check out our seasonal decor services – we bring the same excellent attention to detail to every installation we create!